Back
Practical Guide to EIP-7702: Bundle Transactions and Manage Privileges on Ethereum
Written by FilosofiaCodigo
Mar 26, 2025 · 15 min read
EIP-7702 introduces a new transaction type that allows Externally Owned Accounts (aka. "normal wallets") to temporarily set their code and behave like smart contracts so they don't need to create a smart contract wallet. This makes possible a variety of user experience improvements such as transaction batching, sponsorship and fine-grained privilege setups.
In this article, we’ll explore the capabilities of EIP-7702 and walk through a practical example to demonstrate how it can be used to batch transactions, so users can perform multiple actions in a single transaction.
Reach and Scope of EIP-7702
Let's take a deeper look at the three most important use cases for EIP-7702.
1. Transaction Batching
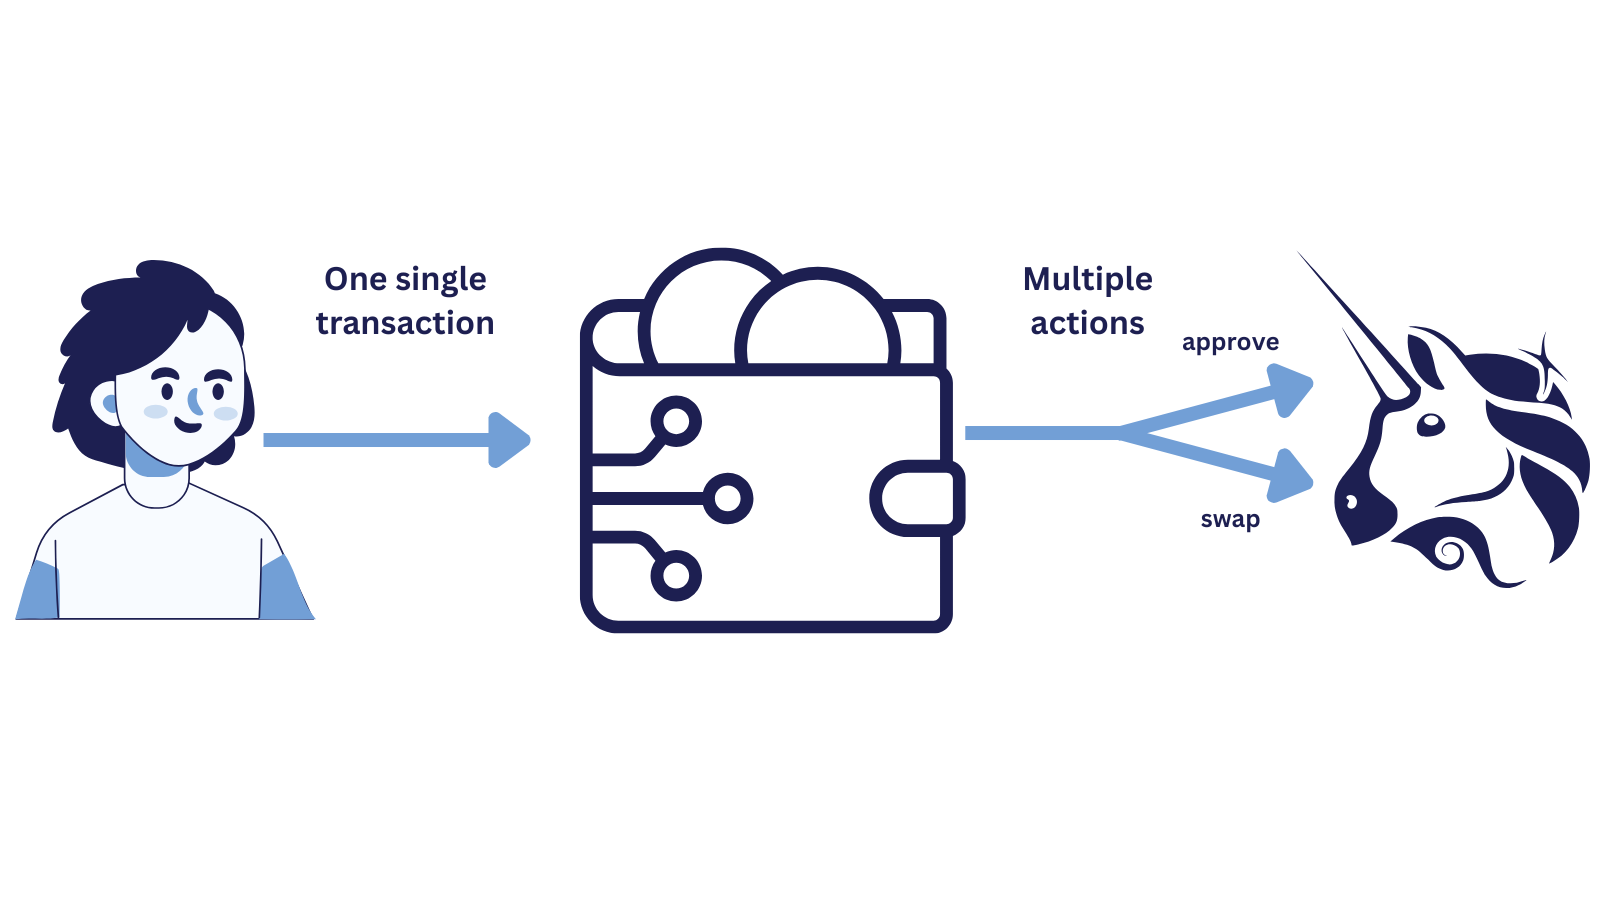
Batching Transactions makes possible to combine multiple actions into a single transaction.
This feature improves the user experience on any dApp by making possible to combine multiple actions into a single transaction. The most obvious use case is approving and transferring tokens in one go, such as approving a DEX to spend your tokens and then executing a trade. But it can also allow users to perform complex workflows in one click, like depositing collateral and borrowing funds in a single transaction, or interacting with multiple protocols without needing to sign multiple times. This is not only a UX improvement, it also improves security by minimizing the risk of errors or partial execution.
2. Sponsorship
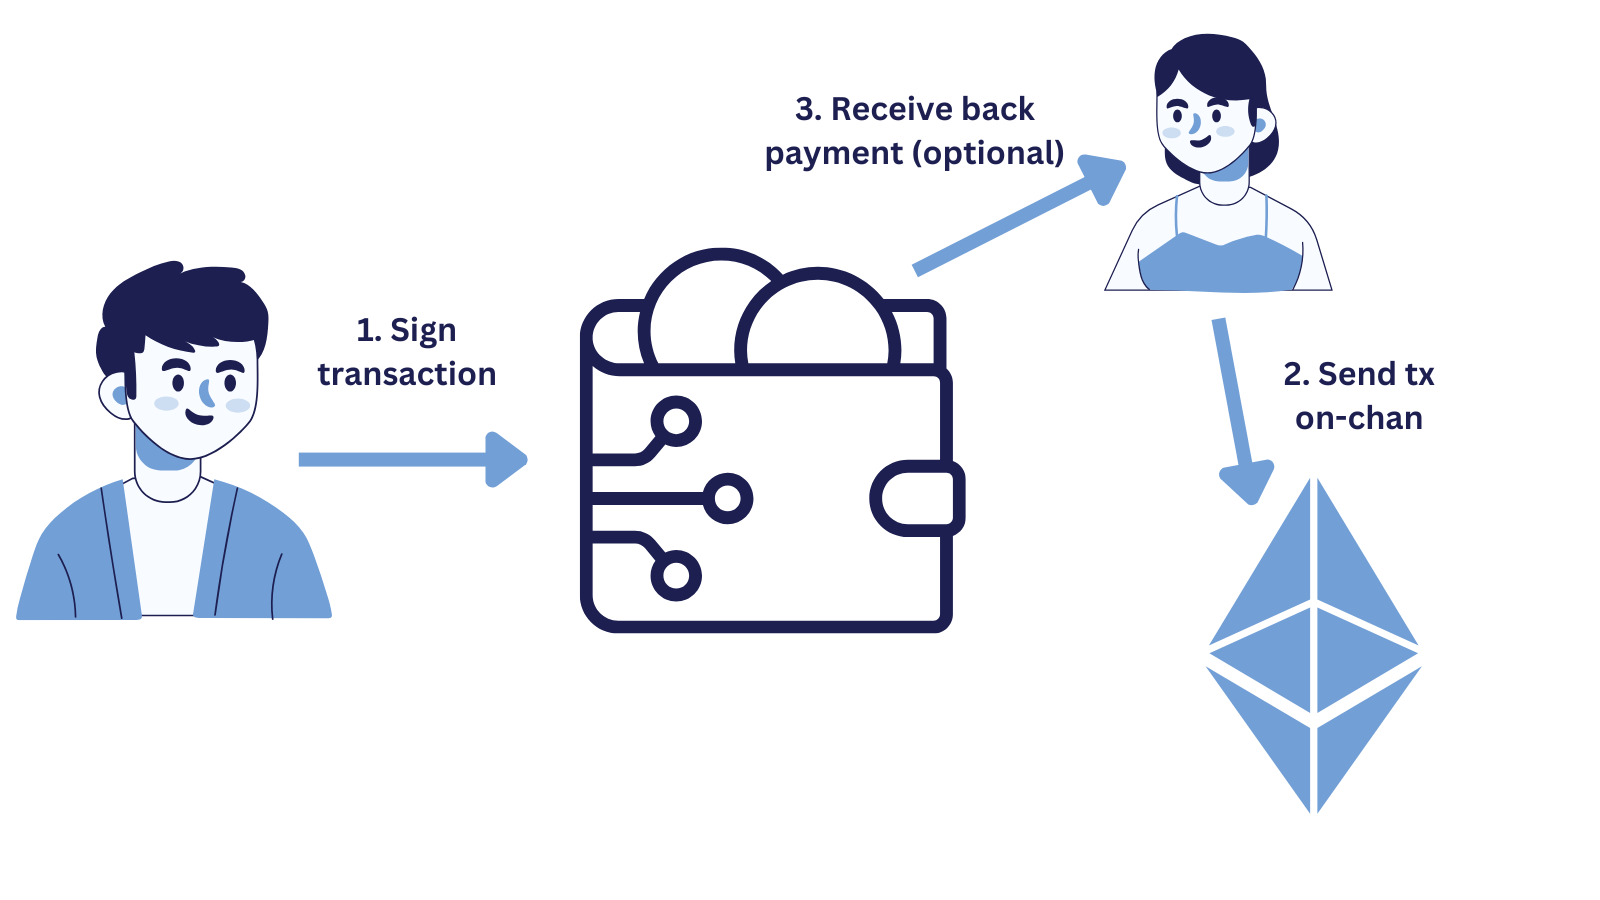
A user can sign a transaction and publish it for a sponsor to pay the fees and execute it on-chain.
Sponsorship makes Ethereum more accessible by allowing users to execute transactions without holding ETH for gas fees. Users sign a secure transaction, which is published publicly for a sponsor to pay the fees and execute it on-chain. Sponsors might recover their costs through wallet logic that rewards them for executing transactions, or as part of a business strategy, such as dApps covering fees to onboard new users and drive adoption.
3. Fine-Grained Privilege Control
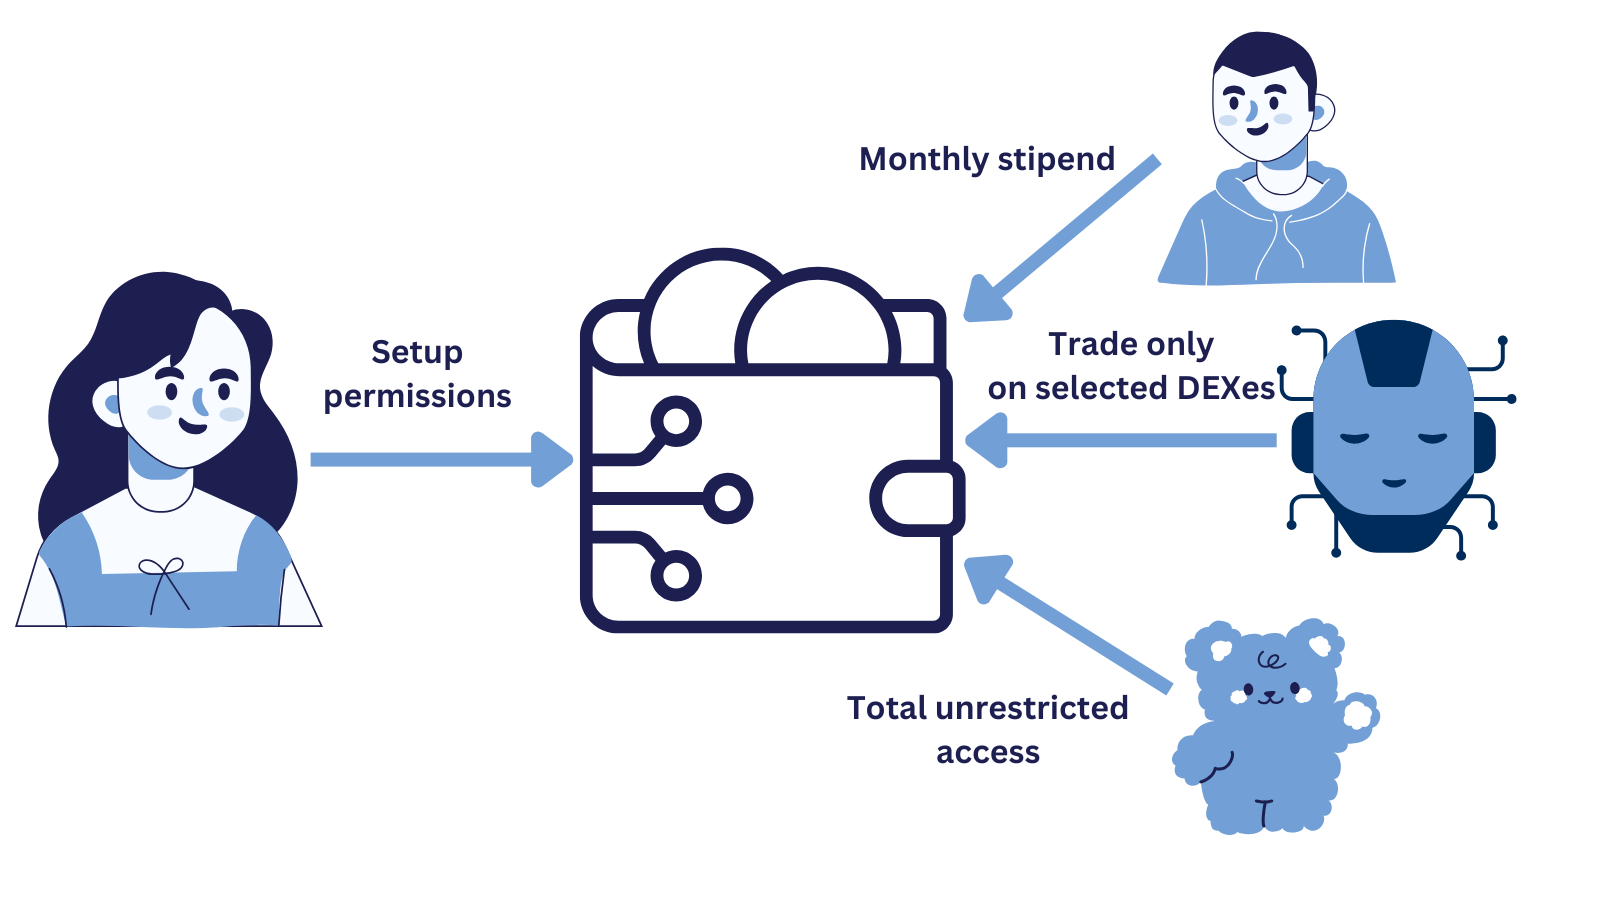
Fine-grained permissions with EIP-7702
Also known as privilege de-escalation, can be integrated into wallets to specify access controls to funds or any action in general. For example, you can limit spending power by setting a daily cap on how much a wallet can spend. Alternatively, you can restrict interactions to specific smart contracts, such as allowing an AI trading agent to only interact with certain token pairs on specific DEXes. Think of it as a personal wallet with the power of multi-sig security, but designed to be as simple and intuitive as a standard wallet.
Notice: For security reasons, the implementation of EIP-7702 should be handled at the wallet level, not the application level. However, it’s very important for both dApp developers and users to understand how this feature works in order to build better products and use them more safely.
Practical Example: Deploying and Interacting with Contracts Using EIP-7702
In this step-by-step tutorial, we’ll deploy a test contract where users deposit tokens, similar to swapping on Uniswap or depositing collateral on Aave. Normally, this would require two transactions: one to approve the contract and another to deposit the tokens. With EIP-7702, we’ll show how to do batch them in a single transaction.
Step 1: Deploy Test Contracts
By the time of writing this article, EIP-7702 is already deployed on Holesky testnet.
Connect to Holesky
First, install a wallet like MetaMask or Rabby as a browser extension. To connect to Holesky, you can do so via Chainlist.org by clicking "Connect to MetaMask" or manually using the following details:
First, select the option to add a network from your wallet.
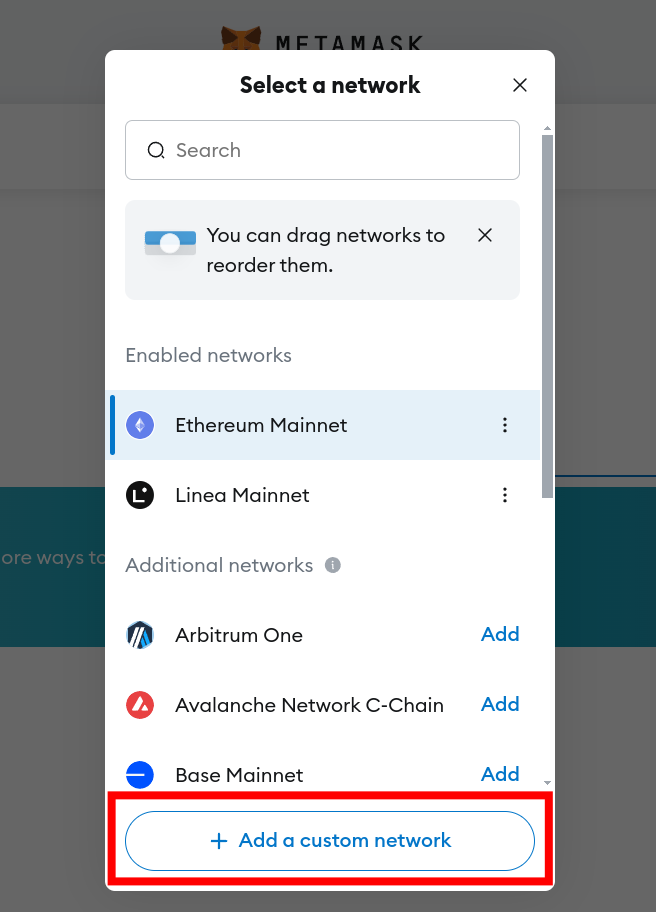
Holesky is not in the list of networks by default, so you need to add it manually.
Then enter the following details:
- Network Name: Holesky
- RPC URL:
https://1rpc.io/holesky(the name can be left blank, and a URL is sufficient) - Chain ID:
17000 - Currency Symbol: ETH
- Block Explorer:
https://holesky.etherscan.io/
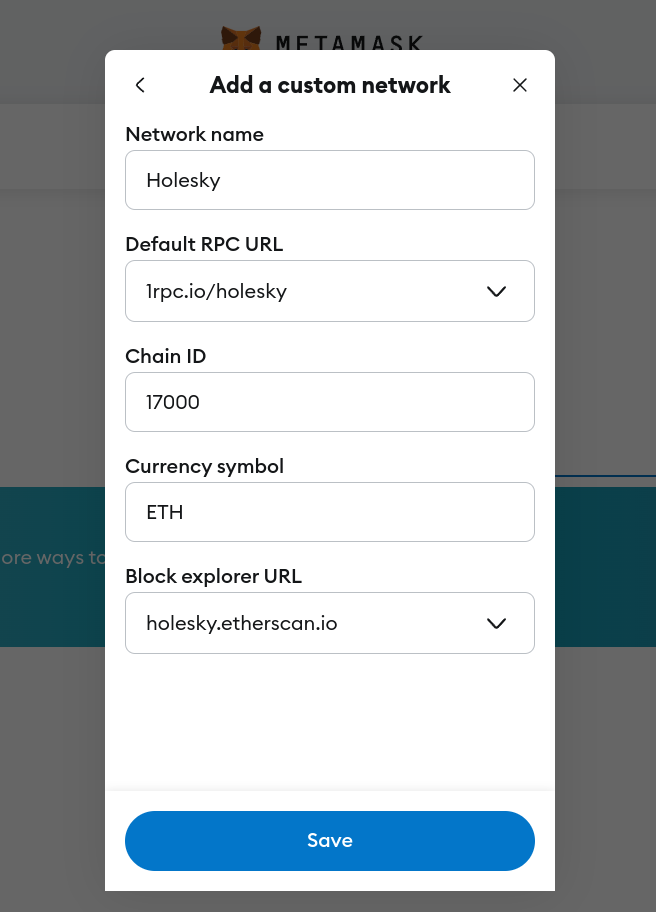
Add Holesky details to your wallet.
Get Testnet Funds
Visit the Alchemy Faucet, log in with an Alchemy account, and enter your Ethereum wallet address (MetaMask, Rabby, ...). Note that you must have at least 0.001 real ether (on Ethereum Mainnet) in that wallet to receive test funds.
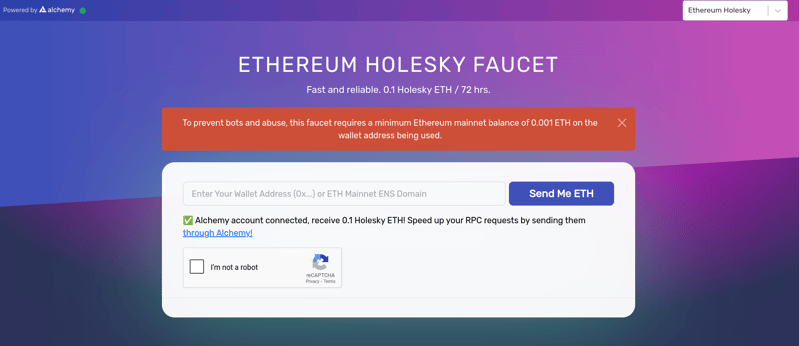
I recommend using the Alchemy Faucet for Holesky.
Alternatively, you can request funds directly by tagging my user @turupawn on Discord. You can find the link to my server in my most recent YouTube video. If it's no longer active, you can request a new link by leaving a comment on the video.
Remember, testnet funds have no monetary value.
Deposit Contract
The following contract allows users to deposit and withdraw ERC-20 tokens. You can deploy it using Remix or any other Solidity IDE.
// SPDX-License-Identifier: MIT
pragma solidity ^0.8.20;

interface IERC20 {
    function balanceOf(address account) external view returns (uint256);
    function transfer(address to, uint256 value) external returns (bool);
    function transferFrom(address from, address to, uint256 value) external returns (bool);
}

contract ERC20Deposit {
    mapping(address => mapping(address => uint256)) public balances;

    function deposit(address _token, uint256 _amount) external {
        require(_amount > 0, "Amount must be greater than zero");
        require(IERC20(_token).transferFrom(msg.sender, address(this), _amount), "Transfer failed");
        balances[msg.sender][_token] += _amount;
    }

    function withdraw(address _token, uint256 _amount) external {
        require(balances[msg.sender][_token] >= _amount, "Insufficient balance");
        balances[msg.sender][_token] -= _amount;
        require(IERC20(_token).transfer(msg.sender, _amount), "Transfer failed");
    }
}
ERC-20 Token Contract
This is a simple ERC-20 token contract for testing.
// SPDX-License-Identifier: MIT
// Compatible with OpenZeppelin Contracts ^5.0.0
pragma solidity ^0.8.22;

import {ERC20} from "@openzeppelin/contracts/token/ERC20/ERC20.sol";

contract MyToken is ERC20 {
    constructor() ERC20("MyToken", "MTK") {
        _mint(msg.sender, 21000000 ether);
    }
}
Step 2: Set Up Your Wallet Delegation Designation
Before sending transactions, you need to set up your wallet to mimic Multicall, a contract that makes possible transaction batching.
Set Up the Environment Variables
Run the following by replacing YOUR_WALLET_ADDRESS and YOUR_PRIVATE_KEY with your wallet details. And YOUR_TOKEN_ADDRESS and YOUR_DEPOSITERC20_ADDRESS with the two contract you just deployed.
my_wallet="YOUR_WALLET_ADDRESS"
my_wallet_pk="YOUR_PRIVATE_KEY"

# Contract address
mytoken="YOUR_TOKEN_ADDRESS"
depositcontract="YOUR_DEPOSITERC20_ADDRESS"
multicall="0xcA11bde05977b3631167028862bE2a173976CA11"

# We will send 1 token, in wei
amount="1000000000000000000"

# Target the holesky chain
rpc_url="https://ethereum-holesky-rpc.publicnode.com"
Check Wallet Code
Before delegation, your wallet’s code should return 0x. You need to install foundry before running the following command.
cast code --rpc-url $rpc_url "$my_wallet"Execute EIP-7702 Delegation
Delegate your wallet to act as the Multicall contract.
cast send --rpc-url $rpc_url --from "$my_wallet" --private-key "$my_wallet_pk" --auth "$multicall" $(cast az)Verify Delegation
After delegation, your wallet’s code should return 0xef0100ca11bde05977b3631167028862be2a173976ca11, where 0xef0100 is the delegation prefix and ca11bde05977b3631167028862be2a173976ca11 is the Multicall contract address.
cast code --rpc-url $rpc_url "$my_wallet"Step 3: Send an EIP-7702 Transaction
Now that your wallet is ready, let’s send a batched transaction using EIP-7702.
Construct the Sequence of Calls
We’ll batch three actions: approve the tokens, deposit them, and reset the approval to 0.
calls=()

calldata=$(cast calldata "approve(address spender, uint256 value)" "$depositcontract" "$amount")
calls+=("($mytoken, false, 0, $calldata)")

calldata=$(cast calldata "deposit(address _token,uint256 _amount)" "$mytoken" "$amount")
calls+=("($depositcontract, false, 0, $calldata)")

calldata=$(cast calldata "approve(address spender, uint256 value)" "$depositcontract" "0")
calls+=("($mytoken, false, 0, $calldata)")
Send the Transaction
Execute the batched transaction in one go.
If you're using Linux run the following.
cast send --rpc-url $rpc_url --from "$my_wallet" --unlocked "$my_wallet" "aggregate3Value((address,bool,uint256,bytes)[] calldata calls)" "[${calls[0]}, ${calls[1]}, ${calls[2]}]"If you're using MacOs run the following instead.
cast send --rpc-url $rpc_url --from "$my_wallet" --unlocked "$my_wallet" "aggregate3Value((address,bool,uint256,bytes)[] calldata calls)" "[${calls[1]}, ${calls[2]}, ${calls[3]}]"You should be able to see your batched transactions on Holesky Etherscan marked as self.
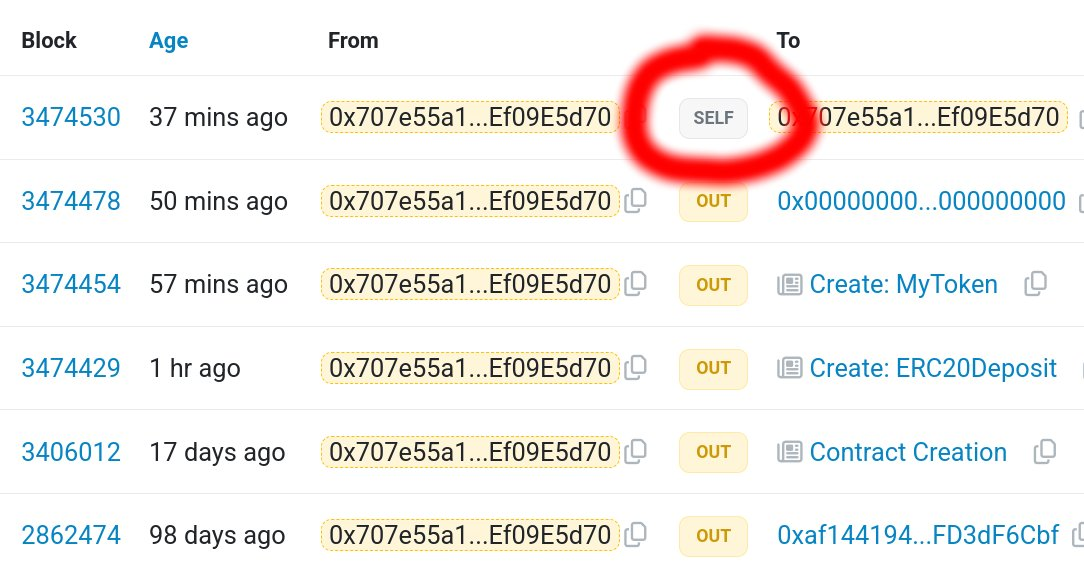
Etherscan marks the EIP-7702 transaction as self because it was executed by the wallet itself.
Conclusion
EIP-7702 is a significant step toward improving Ethereum’s UX, simplifying transactions and enabling users to perform multiple actions in a single, efficient transaction. By allowing EOAs to temporarily act like smart contracts, EIP-7702 unlocks powerful features like transaction batching, sponsorship, and fine-grained privilege control.
To learn more about the technical details of EIP-7702, check out the original EIP, this explanation about the Pectra update and join the discussion.
More Content
Create a stablecoin with on-chain overcollateralized debt.
Learn how to build chance-based contracts using verifiable randomness provided by Anyrand (powered by drand)
Get started with developing privacy applications by combining Circuits and Smart Contracts.
Load Badges by querying EAS and the Scroll Canvas Profile Registry.
Reading Arrays, Structs and Nested Mappings from L1.